
Our DIY Wedding Invitations
Although we weren’t married at our original venue or on our original date, I still want to share details about our wedding invitations on the blog because it was a wedding project that I thoroughly enjoyed. Invitations were something I knew could be very costly and while they’re just paper that 99.9% of recipients will throw in the trash, it was important to me that the invitations be fancy.
I researched SO MANY OPTIONS for months and went back and forth on whether to design something or just pick a suite off a website. There are gazillions of options out there. But if you’re like me and you’re wanting something really unique, sometimes it’s best to DIY it!
Wedding planning gives you the unique opportunity to go all out when it comes to frills and fancies. Of course, we all have budgets and you can either look at that as a restriction to your dream day or a fun challenge. I enjoyed the fun challenge of it all. How could I achieve the aesthetic I was going for without the required stack of cash? And possibly more important for me, how could I make our day uniquely “us?” While I sought inspiration from a number of other weddings, I wanted it to be authentic. (Little did I know, just how truly “unique” our day would end up…)
Here’s how I curated our wedding invitations! I hope it might inspire you to dive into DIY’ing your own!

DESIGN
I choose to design our invitations in Adobe Creative Cloud’s InDesign. You can use a number of other platforms. InDesign is my favorite for printed items mainly because it’s familiar and because of how much you can do in it. Prior to actually laying out the invitation, I played around in Canva to get an idea of fonts and design elements that I liked. Canva offers printing for projects and while I’m not sure what paper quality options they offer for something like wedding invitations, it might be an option worth exploring if you’re most comfortable with their app - you can also download your files and have them printed through a traditional print shop if you’re interested in designing in Canva. (Canva is probably the most user-friendly design platform out there and it’s incredibly affordable!) Microsoft Publisher is another great platform if you have access to it. Use my link in the button below to earn free Canva Credit when you join Canva! (It’s free to join, credits allow you to download elements that would otherwise cost)
FONTS
I wanted our signage, programs and more to be “branded” so to say. Fonts were an important part of that. I used two fonts. I choose Nickainley for a scripted font and Montserrat Light for a sans serif font. Be extremely careful where you download elements like fonts for your invitations or any design needs. Dafont.com is an excellent place to find safe, free fonts to download and where I found Nickainley. Montserrat Light was a font I had found on Canva but wanting to design the invites in InDesign, needed to download the font. I ended up downloading it from Google Fonts. I like symmetry so I centered everything on the invitations. I angled our names for a romantic look.
ARTWORK
Many invitations I had pinned on Pinterest or saved on Instagram incorporated custom artwork, usually in the form of watercolor but sometimes other painting styles. I loved how special the paintings made the wedding stationery. After inquiring with some of the artists I found, I quickly learned this was unfortunately WAY out of our budget. While at first I felt disheartened, I didn’t let it get me down and continued the search for watercolor artwork that maybe wasn’t custom but that would fit our budget. I searched sites like Creative Market and Etsy for downloadable artwork. I still hadn’t found exactly what I had in mind. I remembered a website similar to Etsy, called Fiverr, that I had utilized at a previous job for some creative projects. This site is really cool and much like Etsy in that you can find skilled people for small custom creative projects. I found a watercolor artist who had a similar style to what I was looking for and I reached out to her with details about my project. I loved how many invitations included art specific to the couple and the venue or location so I sent her photos of our flowers, our venue, pictures of us and lots of notes on what I was looking for. In a matter of weeks I had CUSTOM water color paintings that were made into graphics I could use in InDesign. And they were absolutely lovely! I might have shed a few tears when I received the files! Click the button below to receive 20% off your first purchase on Fiverr!
ENVELOPES
I decided to order envelopes because our printer didn’t offer envelopes made from the exact paper of the invitations and therefore the color was slightly different and the textures didn’t match. Since matching was out of question, I choose colorful envelopes that incorporated our wedding colors. Envelopes.com is a great place to find tons of options for reasonably-priced envelopes. I ordered samples of a variety of envelope types, textures, paper weight and colors to make a choice. I went with the Pastel Blue 60lb A7 and Pastel Blue 60lb A1 envelopes (A7 for the full invitation and A1 for the RSVP return envelopes).
TISSUE
While many don’t find this necessary anymore, I thought it added a really classic touch and elevated the overall invitation. Based on my research, I choose a tissue that was smaller than the invitation size. Here’s the invitation tissue I bought on Amazon in a variety of sizes. I went with the 4”x6” (our invitations were the standard 5”x7” size). From what I understand, the purpose of the tissue was to keep the ink from the main card from bleeding onto the envelope or other pieces of the invitation.
RIBBON
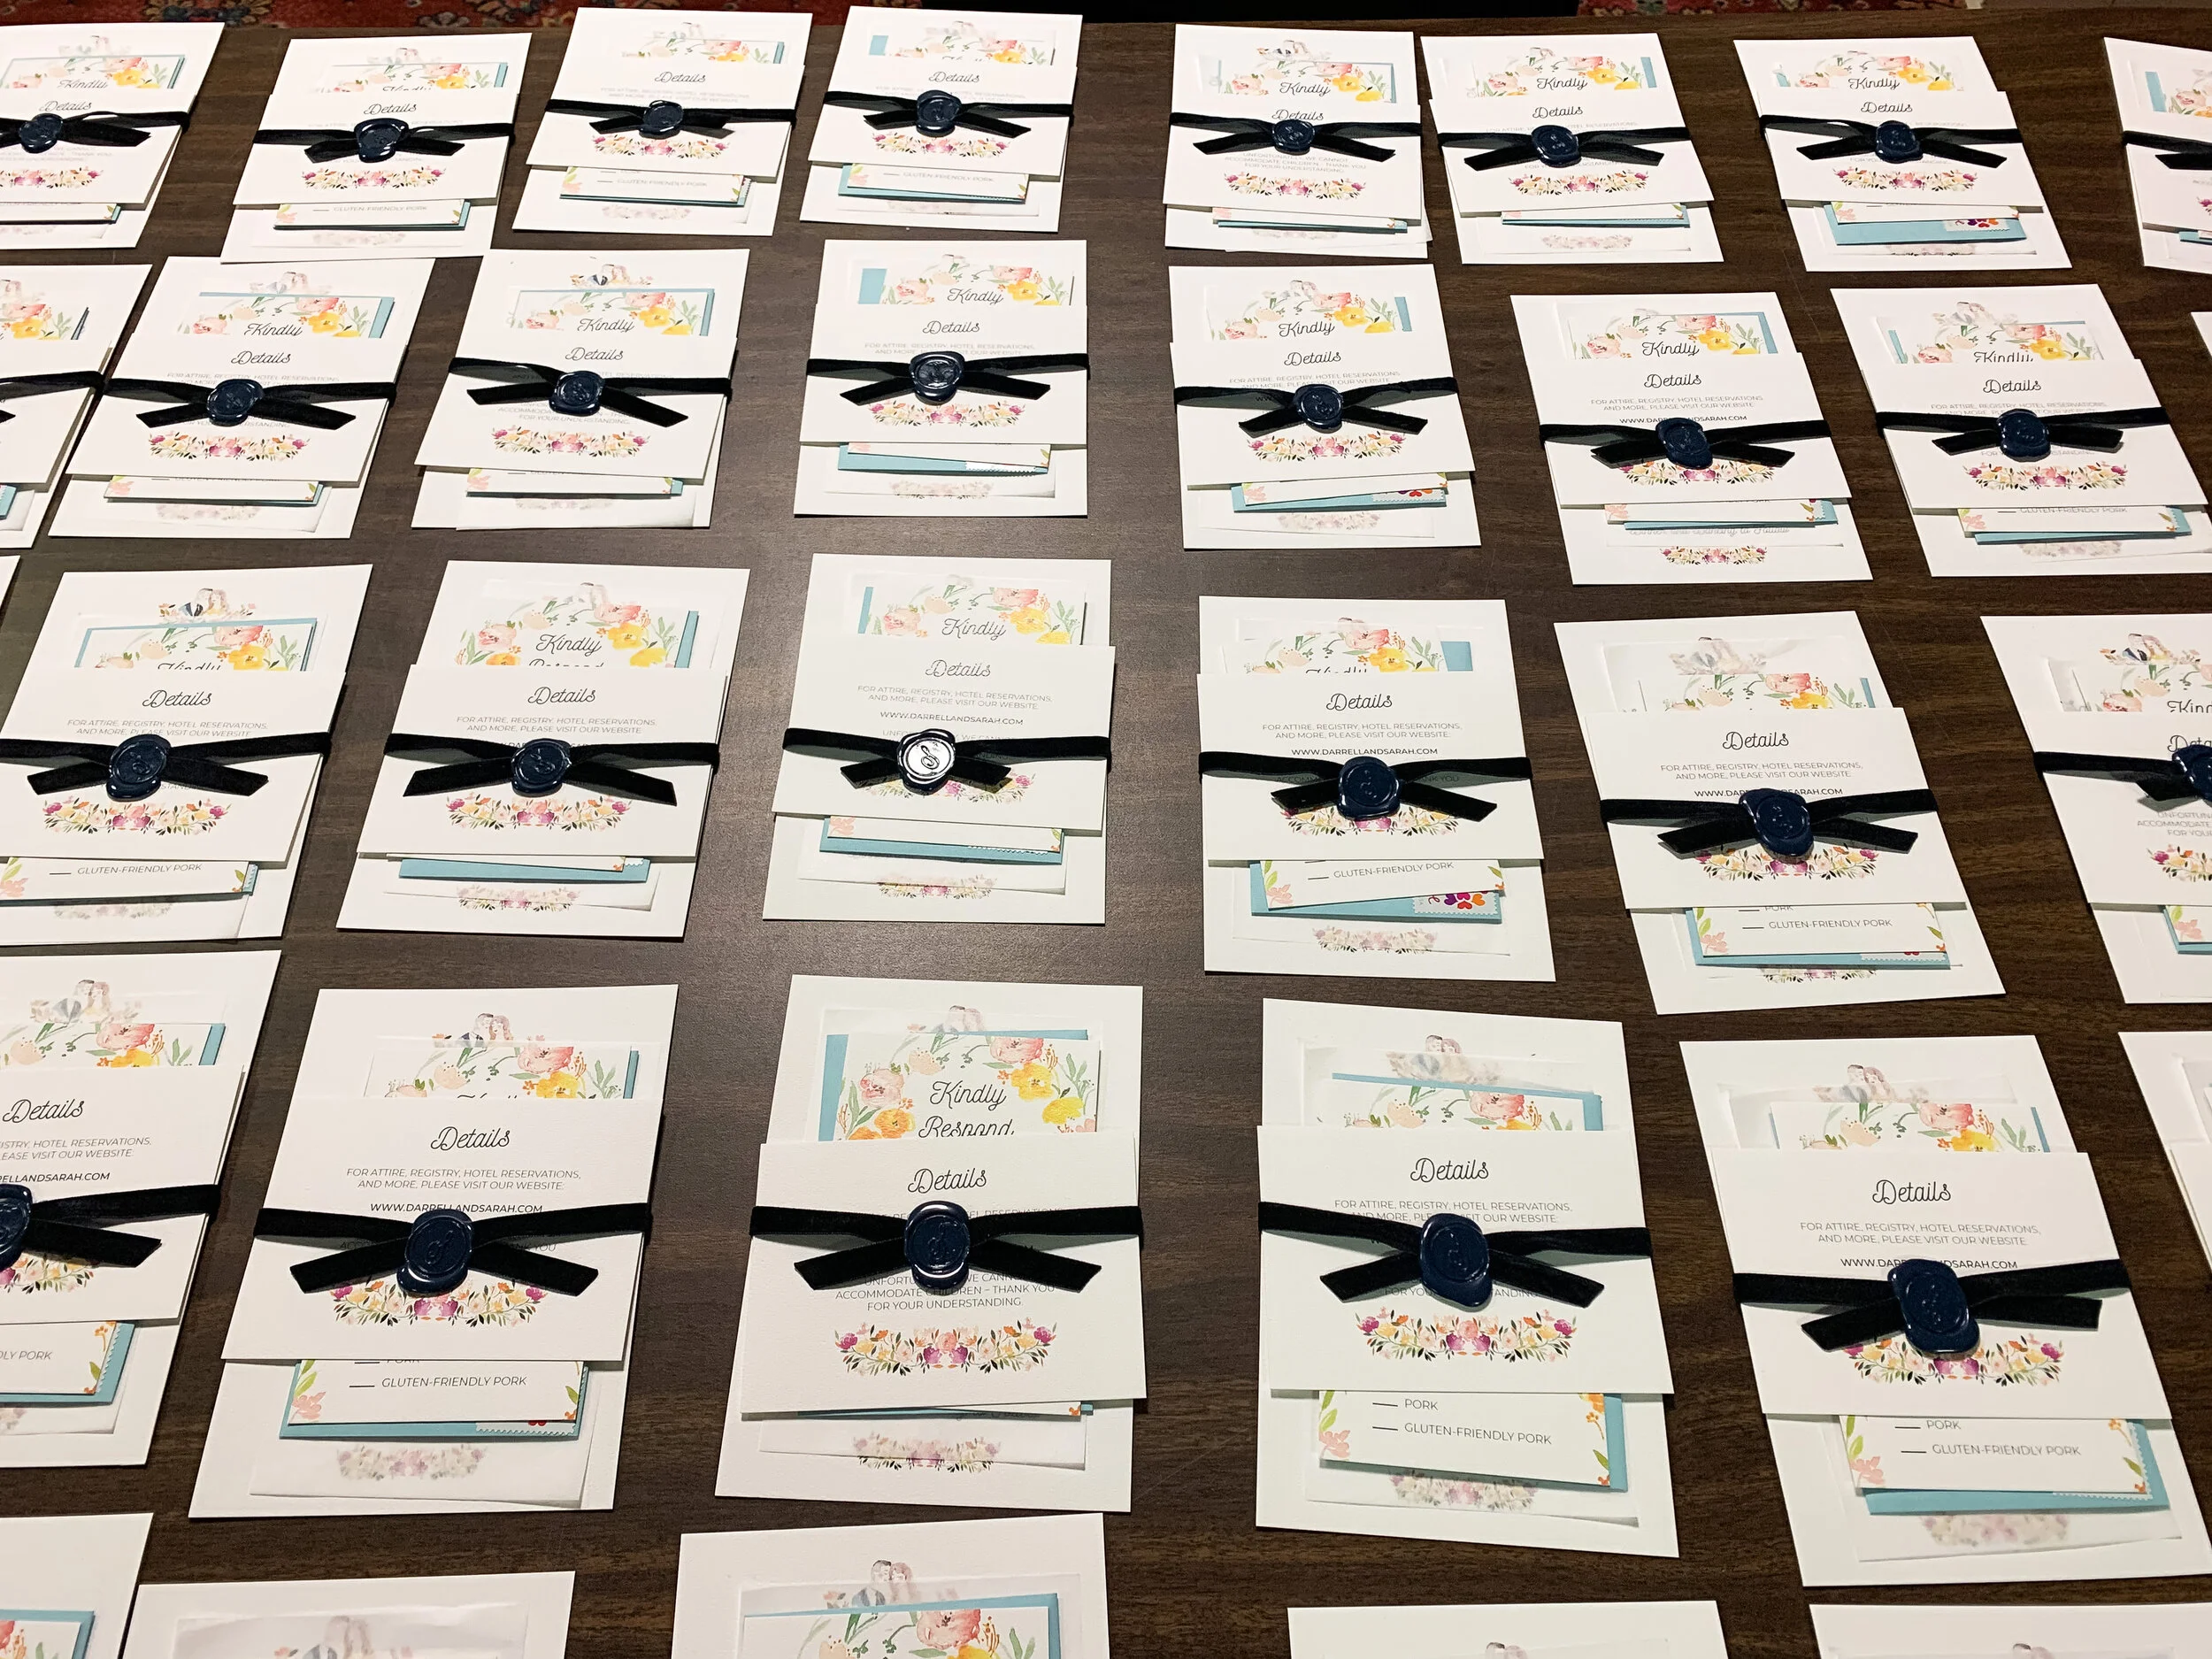
While creating our invitations, I learned a new term… “Belly band” apparently means the paper band or sometimes string or ribbon that holds the contents of the invitation together. Most people tend to use paper belly bands with a sticker or something like that to hold together invitations. Various types of ribbon seem to be a trend these days and I initially envisioned something like a 1” soft and romantic silk or chiffon fringe ribbon. The problem I ran into was that ribbons like that could only be found in “dusty” blues at the time and my color palette did not lend itself to dusty blue. There were some pretty pink colors but pinks were more of an accent color and I didn’t feel like the belly band was a good place to utilize an accent color because I felt like it would throw off the look. Plus the further I got into this project I decided on navy wax and that wasn’t going to work with pink ribbon. I went with a navy velvet 3/8” ribbon and used the wax seal to hold it together.

WAX SEAL
Ahh the wax seal. So elegant. Well initially I had envisioned the wax seal going on the outside of the envelope to keep it closed like people would do ages ago. I quickly learned that would be a nightmare for mailing purposes and would be a quick way to guarantee some didn’t make it to their final destination due to the awkwardness of the protrusion. This really annoyed me but I didn’t see a way around it (at least not one that made me feel secure in mailing them that way). So mom and I decided to use the wax to hold the ribbon together. How did we manage to do this without getting wax all over the cards, you ask? A video on YouTube taught me how to pour the wax over the ribbon with parchment paper under the ribbon to keep it from sticking to the paper while it cooled. The one difference being that mom and I didn’t want to tie the velvet ribbon in a knot because of the thickness it would create. So one person criss-crossed the ribbon in a way that both ends pointed down (NOT one up and the other down like an X) and then with two fingers held the ribbon in place. Then the other person poured the wax and placed the seal. Eventually, we got to a point where one person could do all of this while the other assembled the next few for this step. If this is something you wish to take on, I HIGHLY recommend checking out the YouTube video I linked above for tips and tricks on making this a smooth process.

How did we heat and pour the wax? I found some awesome wax for wax seals on Amazon that you can use in a hot glue gun. This was excellent because it allowed for more control in “pouring” the wax. As for the seal or stamper itself, you can get as fancy as you wish - there are many options out there for elaborate personalized wax stampers - but I went with a simple “S” wax stamper from Michael’s for $7.99.
As we began assembling the invitations (which by the way took a FULL day of working non-stop, with my entire family helping), we realized that one wax stamper (and Cricut & Cricut Pen, which I’ll get to shortly) was not enough and that this would take multiple days at the rate at which we were churning out finished products. Darrell and my dad made a trip to Michael’s to buy more stamps and pens, my mom and Leanna brought their laptops and Cricut machines to accompany my own and together we finished wedding invitation assembly in the wee hours of the morning. Seriously! No joke, we wrapped up WELL after midnight.

So moral of the story, be realistic about your assembly timeline because this was no quick process. Buy additional stamps, pens, etc. if you are short on time or want to recruit helpers.

ADDRESSING
We used the Cricut pen tool to “address” the outside envelope. This allowed us to 1. not hand address each envelope, and 2. create the look of popular calligraphy invitation addressing without hiring a calligrapher or wasting a gazillion envelopes by teaching ourselves calligraphy/hand-lettering. Major props to all of you calligraphers/hand-lettering people out there, that’s serious talent!
I used clear labels to print our own return address labels for the back of the main invitation envelopes and for the front of the small RSVP envelopes.
PRINT SHOP
There are lots of options for printing wedding invitations. I chose to go through a family-run company that I worked closely with in a previous job. Some wedding invitation websites will allow you to upload a design that they print. If you’re looking for excellent customer service and competitive pricing, I urge you to reach out to some local print shops first! I received our invitations way faster than any online print shop could offer and saved a lot of money. On top of that, they were there to answer any questions and provided exceptional quality! If you’re in the Louisville area, I can’t say enough wonderful things about the top notch crew at Able Quality Printing.
SAVE-THE-DATES
I went through the same print shop to have our Save-the-Date cards printed. I wasn’t sure about fonts/theme/look at that point, so I didn’t “match” our wedding invitations but I was super pleased with how they turned out. I also designed the Save-the-Dates in InDesign.


Curating our wedding stationery was a project I thoroughly enjoyed! Is this something you’d ever consider doing for your own wedding?
I’d love to hear how you did or plan to do your own wedding invitations or other aspects of your special day! Have questions about the process? Feel free to reach out!